Friday, December 18, 2009

Key Secrets to a Hot Dog Cart Business

What if there was a way to get yourself out of the job that you have grown to hate, but hang in there for the sake of a paycheck. Most thoughts entering your mind are about owning a business that makes lots of money and you would not need to think about your current job ever again.

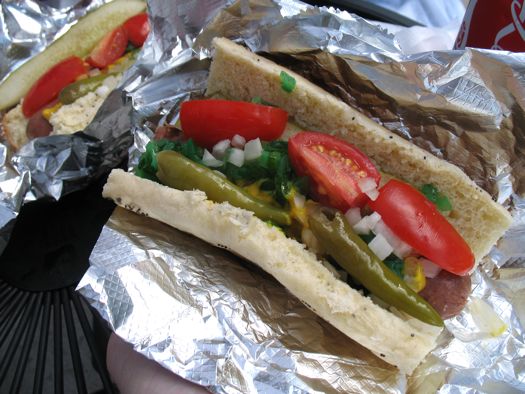
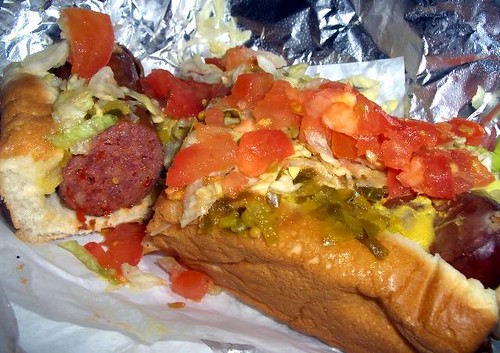
Really think about this for a moment, the Hot Dog Cart Business has been around for over 100 years, and in the USA there are over 20 billion hot dogs eaten every year and over 10% of those hot dogs are sold from Hot Dog Carts which means this business is huge.

As you know owning a business like this and taking a piece of this large pie for yourself will no doubt be the end of your financial problems, but will also get you out of that job you hate, so let me tell you about some of the perks that come with the Hot Dog Cart Business.

* Your the boss

* Work when you please

* Portability (move your cart to any location you desire)

* Scale ability (means you can grow as big as you want)

* This business is very easy to sell

* Low stress

* 100% recession proof

* Very fast start up (about 2 weeks or less)

* Start up costs are only what you can afford

* No education or experience to run this business

* Hot dogs are always in demand

* Very high paying

Have you ever seen any other business that can boast the above mentioned benefits, where they need months and sometime years to be in profit, and many times there is back breaking work which they have to do as long as they own that business.

Time tested methods to starting this business and avoiding costly mistakes which might cause you to give up before you have given it a chance, and stay the course is in a list below, these are easy to understand, but very necessary for you to know.

* How to properly fill out permits

* Best places to buy a cart (new or used in your price range)

* Where to buy your supplies

* How to find locations in any type of weather

* How to get a community kitchen absolutely free

* How to properly cook your product

* How to get free rent

* Plus get tips on body language (comes in so handy)


Source : http://ezinearticles.com/?Key-Secrets-to-a-Hot-Dog-Cart-Business&id=3025256

Using the Best Cheese on Your Pizza

There's nothing more inviting than a sizzling hot pizza fresh out of the oven, covered with bubbling golden brown mozzarella! And since the mozzarella such an important ingredient on pizza it's best to use good-quality cheese. It's better to use a little bit of good-quality cheese than a lot of a cheaper variety.

Traditionally the best Italian mozzarella is made from buffalo milk, Mozzarella de Bufala in Italian. Unlike most store bought mozzarella, this comes in a soft white ball - smaller balls of mozzarella called bocconcini are often sold in tubs of water or brine. Fresh mozzarella can be safely stored in brine about a week or can be frozen if you are in a hurry.

Making your own mozzarella is surprisingly easy and fun. You might not have a buffalo down the street, but milk from a supermarket will do just fine to this as long as it's not homogenised. There's plenty of instructions on the Internet about making your own cheese. The easiest method around can be done in just a few hours and the results will be infinitely better than most cheese you can buy in a store.

Using a good-quality fresh mozzarella or one you made yourself will bring your pizza to life. With such fresh ingredients all a really good pizza needs is a little basil and some fresh tomato sauce to make it into a flavour sensation, so it's worth spending the time to hunt down or make the perfect cheese for your pizza!


Source : http://ezinearticles.com/?Using-the-Best-Cheese-on-Your-Pizza&id=2711767

Friday, December 4, 2009

Types of Cheese For Pizza

Without a doubt the most popular cheese to use for pizza is mozzarella. This cheese originated in the Naples region of Italy and was first made from water buffalo milk. Original mozzarella was of very high moisture content, and had a short shelf life. It The texture of the original mozzarella did not lend to grating at all, and the cheese was usually cut into slices to be used.

Modern mozzarella is now made from cows milk, and is of a lower moisture content to help make it easier to work with and extend the shelf life. Mozzarella is available in a variety of moisture and butterfat content. A little experimenting to find which you like better will be needed, for different mozzarellas have different ways in which they melt and brown.

There is a fresh mozzarella sold that comes as balls of cheese packed in water. This cheese has a different texture and taste than regular mozzarella and can also be used on pizza. It does not grate as it is too soft, and it must be used fairly soon as it turns sour within a few days. This fresh mozzarella is sometimes called scamorze. But mozzarella isn't the only cheese you can use for pizza. Consider trying some of these others for different flavors.

Provolone - Non-smoked provolone has a nutty flavor, creamy texture, and is easy to grate and use. Smoked provolone has a more robust, smoky taste. Provolone can be used by itself, or in a combination with mozzarella.

Cheddar - From white to orange, from mild to sharp, cheddar is a good cheese for pizza. Cheddar melts well, but does not 'stretch', so it is always used in combination with mozzarella or provolone. The more cheddar you use in the blend, the milder it should be. The sharp varieties can dominate the flavor of the pizza, so use them sparingly.

Romano & Parmesan - Two cheese most often used dried and grated over pasta dishes, they can be used on pizza for added flavor. Their flavor can be quite robust, especially the dried and grated kinds, so use accordingly. Parmesan is also available as fresh, and can be sliced or grated. Fresh parmesan has a better all-around flavor for pizza than the dried.

Feta - Feta cheese is a cheese that is cured in brine, and is many times sold in small tubs of brine. It is an excellent cheese to use in combination or all by itself for pizza. Its salty, earth flavor holds up well after baking.

Swiss - Swiss is a very flavorful, salty cheese that not everyone likes used on pizza. it can add a great accent to a pizza, but as it is such a strong flavor should be used in a mixture of no more than 10% Swiss. Swiss can get rubbery after melting, another good reason to use it only sparingly and in a mixture of other cheeses.

Monterey Jack - This cheese is a good one for pizza, best used as a mixture of no more than 30% with other cheeses. Good quality Monterey Jack cheese has many small holes in it.

Muenster - A semi-soft cheese with a great flavor that can be used as an accent on pizza. Grates with difficulty. It can be sliced thinly and put on the pizza.

These are but a few of the alternatives to just plain old mozzarella cheese for pizza. Try other kinds, and see what combinations you can come up with that you like the best. When using other varieties of cheese, remember that as a rule of thumb it is best to blend them with mozzarella or provolone to see what they will taste like. Buon appetito!


Source : http://ezinearticles.com/?Types-of-Cheese-For-Pizza&id=1188372

Thursday, December 3, 2009

Gourmet Cheese Pizza Varieties

Pizza is probably one of the most versatile foods. It can be tailored to suit vegetarians, vegans, meat lovers, seafood lovers and, for the more adventurous, dessert lovers. For all of these, the favorite ingredient is cheese (yes, even the vegans can be in on this with a variety of vegan cheeses now hitting selected markets). As all cheese lovers know, there are so many cheese varieties with distinct flavors and textures that there's a whole world of pizza and cheeses to explore.

Marscapone and Ricotta are a must for the dessert pizza- imagine fresh cut fig with marscapone and honey baked onto a home-made pizza base as an idea. You don't like figs? Then try swapping for thin slices of stewed pear or even fresh strawberries.

For the serious cheese lover the best invention would have to be the three cheese pizza. A fast and healthy way to do it is to use Turkish flat bread or pita bread, ricotta, Parmesan and Feta. Spread the ricotta over the base, crumble the fetta and add a few olives, baby spinach leaves and cherry tomatoes sliced in half then top with the Parmesan. Season with pepper and bake in the oven for ten minutes and enjoy!

Of course, these are just two ideas amongst a myriad of cheese combinations which are a testament to the fact that there is more to cheese and pizza than mozzarella- although who can resist the gooey strings of the creamy, mild mozzarella? As a final idea, next time you are making a pizza and use mozzarella, try sprinkling fresh grated Parmesan on last of all and enjoy how it adds a bit of extra golden cheesy goodness to your pizza.


Source : http://ezinearticles.com/?Gourmet-Cheese-Pizza-Varieties&id=2690124

Friday, October 16, 2009

How to Enjoy French Food


When Americans think of fine dining, one of the first foods that come to mind id French food. French food is synonymous with "haute cuisine". French food differs greatly by the different regions in France. In this article I will highlight for you briefly some of the regions of France and the food that is typical for that region.

First, Champagne, this region is best known for the sparkling wine that comes from this region, but fine wine is not all it is known for. Champagne is part of 3 regions that are known for their fine gourmet French food. Lorraine is known for its for its wonderful fruits and is most famous for quiche. A baked dish made from eggs, cream, and pastry.

Secondly Paris who doesn't think of Paris when we speak of French food. Paris is famous for all French delicacies as well as for food from countries all over the world. A Paris restaurant can offer you a wonderful selection of meat broiled or stewed in a tasty sauce. All over Paris you can find wonderful seafood restaurants serving fresh shell fish over ice. No city serves better Mussels then those found in little Bistros in Paris. You will find dishes such as escargot {snails} that are so popular in Paris as well as a whole pigs foot on your dish. Everyday in Paris you can find something wonderful and new to try. From the very unusual to the fine everyday sandwiches sold on the street.

Third, Brittany and Normandy because of their close proximity to the ocean have outstanding seafood. The Brittany are has a fine assortment of lobster, crayfish and mussels. Normandy in the north has a wonderful selection scallops, and sole. Normandy also has many great fruit trees, especially apple trees that allow them to have wonderful baked goods as well as ciders.

Fourth, Burgundy and Bordeaux are known for the finest of wines. This region is also home to Dijon mustard famous served with many French food. This area is also known for fine poultry, river pike and many sweet treats. Where ever you dine on French Gourmet food you are in for a real treat.


Source : http://ezinearticles.com/?How-to-Enjoy-French-Food&id=2346974

Thursday, October 8, 2009

Food Processors and French Cooking


A Frenchman invented the food processor to help restaurants and catering companies speed up the food preparation time back in the 1960s. Pierre Verdon invented the first food processor and called it the "Robert Coupe". It wasn't until 1972 that he designed a food processor for the home user called the "Magimix".

In the United States, Carl Sontheimer brought out a food processor called the Cuisinart in 1973. Popular Chefs like Julia Child immediately embraced the food processor as a huge time saver and other companies soon offered similar models to the Cusinart. In the late 1970s, and sales of food processors skyrocketed to 100s of thousands.

Food processors are of two basic styles. Some have a single bowl and a flat blade that, depending on the skill of the operator, can do just about any task. That's how the original design of Pierre Verdon worked. These days there are many accessories that include extra bowls, a lid, chopping blades, mixing blades, and disks for slicing and shredding. There are many sizes now too. From Mini Food Processors that have a capacity of 3-4 cups, Small Food Processors that hold 6-9 cups, and the full size Food Processors that can hold up to 14 cups.

Many Chefs have created different methods to take advantage of the flexibility of all the accessories and attachments. You can now find recipes on everything from Ice Cream to Salsa. There are cookbooks dedicated to using the food processor to make just about any type of meal or dish. I've even seen a recipe for homemade soap!

The Mini Food Processor has had a huge impact on meal preparation since it is small and convenient. Most user complaints about a food processor is the time it takes to drag it out and then clean it for 5 minutes of use. The new Mini models are small and can be left right on the kitchen counter for quick cutting or chopping chores. These units also are dishwasher safe and that cures the clean up problems.

Many of the most popular French cooking recipes call for some type of food preparation with a food processor. Although originally designed for restaurants and catering companies due to the volume of cutting and chopping, even home users can benefit from the timesavings and flexibility. Anyone can quickly learn how to add fresh chopped vegetables to any meal.

And when it comes to making just about any type of dough for baking, a food processor really comes in handy. Making fresh pasta, rolls or bread, pastry, and many fancy desserts is a quick process. Most food processors come with a handy guide to making just about any type of dough.

French cooking is all about using simple beginnings to come up with magnificent meals full of flavor and presented with a flourish. The French style of cooking involves sauces and spices that transform your everyday vegetables into a gourmet meal. The art is in both the preparation and the presentation, and no detail is left to chance.

Common cooking techniques like blanching, which is boiling or scalding fruits and vegetables to hold color and make skin removal a snap. Reducing sauces (removing moisture) to increase the flavor and create rich color and texture. Roasting vegetables and meats before combining into dishes that adds a unique and caramelized look, texture, and taste. Making fresh spices from raw ingredients have a much richer flavor that enhances any vegetable, meat, or fish.

French meals are often served by course with palate cleansers to allow each dish to be savored with it's own flavor and taste. The French enjoy both cooking and eating; they rarely rush any of the necessary techniques for preparation or serving. A well-prepared French meal is an event and meant to be leisurely enjoyed.

French cooking is an art and a food processor comes in real handy to save time and work. If you enjoy cooking and spend a lot of time in the kitchen, a food processor can make life a lot easier. Throw in a few French cooking techniques and you can be a French Chef.


Source : http://ezinearticles.com/?Food-Processors-and-French-Cooking&id=2954033

Wednesday, March 4, 2009

The Basic Beignet Dough for Baking


In French, this kind of beignet dough is called pâte à choux or pâte à beignets soufflés or, more colorfully, pets-de-nonne, nun’s farts, and is made with flour and butter stirred into boiling water, with eggs then being incorporated one at a time. It is an ordinary cream puff pastry, the same kind used for making cream puffs and eclairs. Beignets are popular elsewhere in the Mediterranean too, such as Italy where pastella per bignè can also be called pasta reale. In Greece beignet dough is called sou. There are two kinds of beignet dough, one for baking (this one) and the other used for deep-frying.


Yield: Makes 30 medium-size or 60 small beignets
Preparation Time: 1 hour

1 cup whole milk

1/2 cup (1 stick) unsalted butter

3/4 teaspoon salt

1 cup all-purpose unbleached flour

6 large eggs

Freshly grated nutmeg (optional)


1. Put the milk, butter, and salt in a large, heavy saucepan and turn the heat to medium-high. Once the butter has melted, add all the flour all at once. Stir with a wooden spoon until it creates a dough, pulls away from the sides of the saucepan easily, and the butter begins to ooze a little, 1 1/2 to 2 minutes. Transfer to a bowl.

2. Preheat the oven to 400 degrees F.

3. Beat the eggs into the flour mixture, one at a time, beating vigorously with a fork and making sure each egg is absorbed and the dough is smooth before you add the next one. Sprinkle with nutmeg, if desired.

4. Butter a baking sheet and, using a tablespoon, drop large tablespoonfuls of the dough in rows on the sheet 1 1/2 inches apart. Each droplet of dough should be about an inch in diameter for smalls ones and 2 inches for medium-size ones. Bake until golden brown, 22 to 25 minutes. Do not be tempted to peek in the oven, and if you simply must, crack the oven door slowly open, otherwise, the puffs may collapse. They will look and seem done at 20 minutes, but they are not; continue to bake until they are firm when pressed down on top with your finger, another 2 to 5 minutes.


Source : http://www.cliffordawright.com/caw/recipes/display/bycategory.php/recipe_id/856/id/45/

Burger the delicious fish


Ingredients

  • 1 1/2 pounds cod or other white fish
  • 1 large egg, lightly beaten
  • 2 tablespoons mayonnaise
  • 1 tablespoon prepared mustard
  • 1 tablespoon butter or margarine, melted
  • 1 teaspoon chopped fresh parsley
  • 3/4 teaspoon salt
  • 1/2 teaspoon dry mustard
  • 1/2 teaspoon freshly ground pepper
  • 1/4 teaspoon garlic salt
  • 1/8 teaspoon ground red pepper
  • 3/4 cup crushed cornflakes cereal
  • Vegetable oil
  • Red Leaf lettuce leaves, tomato slices, and red onion slices
  • Jalapeño Tartar Sauce
  • 6 sandwich buns, split

Preparation

Place fish in lightly greased 13- x 9-inch baking dish; cover with aluminum foil.

Bake at 400° for 20 minutes or until fish flakes with a fork. Drain; cool and flake. Combine egg through red pepper in a large bowl. Stir in flaked fish. Shape into 6 patties; coat with crushed cereal. Place on paper towels; refrigerate 1 hour.

Pour oil to a depth of 1/2 inch in a large heavy skillet. Fry patties in hot oil over medium heat about 2 minutes on each side or until golden. Drain on paper towels. Serve in buns with lettuce, tomato, onion, and Jalapeno Tartar Sauce.


Source : http://find.myrecipes.com/recipes/recipefinder.dyn?action=displayRecipe&recipe_id=346655


Tuesday, March 3, 2009

Fu Yung Hai meat kepiting


The Omelette material: * 100 gram meat kepiting * 100 gram bamboo shoots, the slice of the form of the match api * 2 rods of the leek, the slice halus * 1 garlic fang, memarkan * 3 items of the egg, kocok * 1/2 the teaspoon garam * 1/2 the teaspoon of pepper bubuk * 1 tablespoon of butter/margarin * 5 tablespoons of oil The Sauce material: * 1 garlic fang, memarkan * 50 cc air * 5 tablespoons of sauce tomat * 1 teaspoon of flour maizena * 50 gram peanuts polong * 1/2 the teaspoon cuka * 1 teaspoon of sugar pasir * 1 teaspoon garam * 1/2 the teaspoon of pepper bubuk * 1 tablespoon of butter/margarine
For the Spice: * Peanuts goreng * Cabe * Garam * Gula * The shallot & the Onion of Putih * Candlenuts/peanut butter * Chilli sauce sauce The instruction: * The omelette: heated margarine, then put the garlic, stir-fry through to kuning * Put crab meat, bamboo shoots, the leek, salt, and ground pepper, stirred level, adopted, cool down, then put the egg, stirred level, for became 2 bagian * Heat oil, then put 1 part dadaran, cooked through to ripe brownish, adopted, tiriskan, repeated once more, sisihkan * Sauce: heated margarine, then put the garlic, stir-fry through to kuning * Put water and tomato sauce, stirred level, boiled, then put flour maizena that was diluted with a little water, stirred level, didihkan * Put peas peanuts, salt, sugar, ground pepper, and the vinegar, stirred level, cooked until sauce congealed, adopted.


Source : http://bima.ipb.ac.id/~anita/fu_yung_hai.htm

The Fried chilli prawns with pea shoots


Pea shoots are one of the most flavoursome greens used in Chinese cooking. You can often find them in Asian supermarkets in among the pak choi and choi sum. They don't go a long way so be careful when you're cooking them and leave them in the pan for the minimum amount of time.

With the current press about the environmentally damaging farmed prawns, which are exploiting coastal habitats, you may want to steer clear of them and use the fresh Red Sea prawns that Waitrose stock; they have a much better flavour and you can enjoy your supper with a clear conscience.

20 large fresh prawns
2 red chillies, thinly sliced
4 cloves of garlic, peeled and crushed
Salt and freshly ground white pepper
3tbsp sesame oil
1tbsp oyster sauce
8 spring onions, trimmed and sliced thinly on the bias
300g pea shoots

With a sharp knife, cut the prawns through the back and head but not all the way through so that they are butterflied. Lay them on a tray and scatter with the chilli and garlic and season.

You will need two large pans for the prawns or, alternatively, you could use a griddle plate. Heat the pans with half of the sesame oil until it's almost smoking and fry the prawns, flesh-side down, for a minute or so on each side, then add the oyster sauce and a tablespoon of water, stir well, remove and keep warm.

Wipe the pan – or pans – clean and return to a medium heat. Add the rest of the sesame oil and then add the pea shoots and spring onions, season to taste and cook for 2-3 minutes, stirring every so often, adding a little water if they seem to be colouring and drying out. Transfer to a serving dish and lay the prawns on top.


Source : http://www.independent.co.uk/life-style/food-and-drink/recipes/fried-chilli-prawns-with-pea-shoots-825056.html


Monday, March 2, 2009

Prawns spring rolls


Ingredients
16 large fresh raw prawns
2 tbsp vegetable oil
¼ head savoy cabbage, thinly sliced
100g/4oz shiitake mushrooms, thinly sliced
1 tsp chopped fresh ginger root
1 garlic clove
1 tsp sesame oil
salt and freshly ground white pepper
4 large spring roll wrappers, cut in 4 squares to give 16 pieces
2 egg yolks for sealing
1L/1¾pt vegetable oil for deep-frying

For the salsa:
1 yellow pepper, peeled, seeded and diced
1 red pepper, peeled, seeded and diced
2 tbsp rice wine vinegar
1 tbsp sugar
1 tbsp tomato ketchup
1 tbsp fresh chives, snipped
2 tbsp chopped fresh coriander


Method
1. Cook the prawns in a large pan of boiling, salted water for 3 minutes. Refresh them in cold water and peel them so that you have only the fleshy tail meat. Chop this into 1cm/½in dice. Set aside.
2. Heat the vegetable oil in a large frying pan until it is smoking. Add the cabbage, mushrooms, ginger and the garlic. Stir fry for exactly 1 minute and then tip into a large bowl. Allow to cool and then add the prawns and sesame oil and season with salt and pepper. Mix well.
3. Lay the spring roll wrappers out in a diamond shape. Arrange the mixture on the wrappers in a cylinder shape. Fold up the bottom corner over the mixture then pull in the two side corners. Roll up over the top corner and brush very lightly with the egg yolk to seal it closed. Note that it is important not to let the wrappers dry out before they are filled. Also, do not overfill them.
4. To make the salsa, fry the peppers in the oil over a gentle heat for 2 minutes. Add the plum tomatoes and fry gently for a further minute. Add the wine vinegar, sugar, ketchup and taste for seasoning. Season with salt and pepper if necessary. Do not add the chopped chives and coriander until just before serving.
5. To serve, heat the oil in a large pan to approximately 180C/350F when a cube of bread will brown in one minute. Fry the spring rolls in small batches for about 5 minutes until golden brown. Drain on kitchen paper. Serve immediately with plenty of the fresh salsa on the side.


Source : http://www.bbc.co.uk/food/recipes/database/crispyprawnspringrol_7358.shtml

The Chicken curry


To prepare this curry, you make a sauce from vegetables and spices first, then add the meat and stew it. The sauce is then thickened with yoghurt, and the sweetness of the curry is balanced with a little sour lime juice.

Ingredients
4-6 medium tomatoes
1 medium onion
4 tbsp vegetable oil
3cm/1in piece root ginger
2 garlic cloves
1-2 mild green chillies
1 tsp ground coriander
1 tsp ground cumin
¼ tsp ground turmeric
salt and freshly ground black pepper
100ml/3½fl oz water
1 free-range chicken, jointed into 8 pieces, or 8 thighs and/or drumsticks
2 tbsp yoghurt
1 lime (or lemon)
a small bunch of coriander leaves
cooked rice, to serve


Method
1. To skin the tomatoes, nick the skin of each tomato with the point of a sharp knife, then put the tomatoes in a bowl next to the sink and pour over some very hot water from the kettle to cover. Count to 20, then carefully pour away the water. When the tomatoes are cool enough to handle, peel away the skin, halve the tomatoes, squeeze out most of the pips and juice into an empty bowl, and discard. Chop the flesh roughly and put it down on a plate to one side.
2. Peel and finely chop the onion. Fry the onion in the vegetable oil in a large heavy-based saucepan over low to medium heat for about ten minutes, stirring from time to time so that it turns an even golden brown. Watch carefully to make sure it doesn't burn.
3. Meanwhile, peel and finely chop the ginger and the garlic.
4. Slit the chilli using a sharp knife. Slice the flesh away from the cluster of seeds in the middle. Avoid touching any part of the chilli with your fingers if you can, as it is very easy to get chilli in your eyes, and that will sting. You can use a fork to hold the chilli down or wear rubber gloves. Chop the chilli finely.
5. Measure the ground spices into a teacup. Add the ginger, garlic and chilli to the pan, stir them around and fry for another minute or so. If you want your curry to be hot as well as spicy, include some or all of the chilli seeds. Then add the spices in the cup into the onions. Fry the spices for a minute or two, stirring all the time so that they do not stick. Add some salt and freshly ground black pepper.
6. Pour in the water and the tomatoes, bring to the boil, turn down the heat a little and let the sauce simmer for 5-10 minutes.
7. Add the chicken pieces to the pan and stir them around so they are covered with the sauce. Put the lid on the pan, turn the heat down and let the chicken cook for 30-40 minutes, stirring occasionally. Chicken thighs will take longer to cook than breast pieces.
8. Now add the yoghurt to the chicken and stir it in. When the sauce is gently bubbling again, scoop up a little in a teaspoon, blow it cool and taste it. The sauce will probably taste quite sweet because of the tomatoes. Cut the lime in half and squeeze its juice into the sauce. Stir and taste again, and decide whether you want to add the second half.
9. Finally, chop the fresh coriander leaves and sprinkle them on to the curry just before you serve it with the rice.


Source : http://www.bbc.co.uk/food/recipes/database/chickencurry_82424.shtml


Sunday, March 1, 2009

The Kangkung with Bean Sauce


I had a bunch of Kangkung (known variously as water convulvulos, morning glory, tung-choy (HK)) in the fridge. The usual ways of cooking kangkong in my family are
a) stirfried with sambal belacan
b) stirfried with garlic, fu-yuu (white fermented bean curd) and chilli. Alternatively, I would make a sauce of fu-yu, chilli oil, Chinese wine and sugar and toss that with boiled kangkong.
c) stirfried with plenty of garlic.

Last night the usual ways did not appeal. Or rather, options a) and c) did not appeal, and although option b) did, I had no fu-yuu at home. However, there was something else in the fridge that caught my eyes, a jar of Yellow Bean Paste. Hmm. similar to fu-yuu, both are kind of salty, savoury and strongly flavoured. The yellow bean paste would have been quite flat used on its own, it is usually cooked with meat. And suddenly the thought of kangkung and pork in a yellow beany sauce began to sound appealing to me and I had a go at cooking it. Well, the end result tasted rather good, but on the salty side, on account of the yellow beans. It would have been better if it was eaten with rice....I think this recipe would work with black beans or toban (chilli bean) sauces. There is no accompanying picture because we did not think to take one, but it really is quick and easy to cook.

Kangkung with Pork and Yellow Bean sauce

1 bunch of kangkung, washed, with stalks separated from leaves
Chopped Garlic
Chopped Onions
2 tsp Yellow Bean sauce
Pork, sliced thinly
Cooking alcohol (whisky in my case, but shaoxing wine or cooking sherry would do too)- as marinade, and during cooking.

1. Marinate the sliced pork with white pepper, sesame oil and cooking alcohol for 30 minutes
2. Heat some oil in the wok and toss the pork on high heat for about 2-3 minutes to cook it. Scoop out the pork and set aside.
3. Add more oil into the wok if needed. Toss the garlic and onions on medium heat until fragrant. Add the yellow bean sauce and toss some more.
4. Throw in the kangkung, stalks first, followed by leaves. Crank the heat up to the maximum setting. There will be a lot of sizzle and sazzle. Don't worry. Toss the vegetables until it wilts, about 2-3 minutes. Do NOT add water, the vegetables will naturally 'sweat' water. Splash some alcohol on the side of wok and return the cooked pork to the wok. Toss to combine, and it is ready to serve.


Source : http://umami.typepad.com/umami/2004/05/kangkong_with_b.html